Walk around Winnipeg in January and you can tell pretty quickly who owns a hot tub. Their driveway is shovel-polished to perfection, their backyard has a well-worn path through the snow, and the people themselves have that smugly relaxed look you usually see on vacationers at warm airports. A good hot tub gives you a little winter rebellion, a steaming pocket of summer on a minus 25 night. But the tub is only half the story. The way you design your space around it decides whether you get a fifteen-minute soak with chattering teeth or a year-round retreat that outperforms your favorite spa.
I have installed, placed, and re-placed more hot tubs than I care to admit, in backyards from St. James to St. Vital. I’ve also seen the absolute extremes: tubs perched precariously on wonky decks, tubs entombed in pergolas that trap steam like a greenhouse, and tubs that turned into giant birdbaths every spring because someone forgot the site grading. If you are browsing hot tubs for sale or typing “hot tubs store near me” hoping for a quick answer, take a beat. Think about the whole picture, not just the shell, jets, and price tag. Here’s how to design a hot tub setup in Winnipeg that feels right in July and heroic in February.
The Winnipeg Factor
Hot tubs are sold across the continent, but not every climate slaps them with the same challenges. Winnipeg does. Those challenges also happen to be opportunities if you plan well.
Start with temperature swings. We see summer highs that make you want iced tea and shade, then winter lows that make you want a wool hat squeezed tight over your ears while you steam away like a dumpling. That swing affects everything: insulation in the cabinet, the cover’s R-value, the heater’s duty cycle, and even where the steam goes when you open the lid. Add our wind, which regularly turns backyards into wind tunnels, and you begin to see why a smart layout beats a pretty one.
Then there’s snow. A single wet snowfall can pile up 10 to 20 centimeters in one night. If you have to shovel an obstacle course every time you want a soak, you won’t use the tub. The inverse is also true: if your path is short, grippy, and lit, you’ll be in that water at least three times a week, even when the Blue Bombers play Home page in a blizzard.
Lastly, code and foundations matter here. Frost depth in Winnipeg typically hits around 1.8 meters. Anything that bears weight needs either proper isolation from frost heave or a slab that’s compacted, level, and well-drained. A full hot tub can weigh the better part of a compact car. Imagine parking that on a trampoline. That’s what a poorly supported deck feels like after one winter.
Picking the Right Tub for the Space You Have
Choosing from the universe of Winnipeg Hot Tubs becomes manageable when you narrow the decision by fit and function, not just features.
Footprint. Most families land between a 6 by 6 and 8 by 8 foot shell. Larger tubs are great for parties, but they eat deck space and take longer to heat. If you plan frequent winter soaking, a slightly smaller tub heats quicker, holds temperature better, and costs less to run. In my experience, a 5 to 6 seat layout suits most households better than the 8 to 9 seat behemoths that look impressive on a showroom floor.
Seating style. Lounge seats are popular, but they rarely fit everyone. Tall people float, shorter people slide, and half of your guests avoid the lounger after one try. If you want versatility, choose a design with open corner seats and one deeper therapeutic chair. Test-sit in the showroom with your actual crew before you buy. Wear comfortable pants and embrace the awkwardness. Your future back will thank you.
Insulation and cabinet. Look for full-foam or dense perimeter insulation instead of thin batting. You’ll hear terms like closed-cell foam and reflective barriers. In Winnipeg, the practical test is simple: ask the dealer to open a panel and let you feel the density and continuity. Any gap in insulation becomes a winter draft inside the cabinet, and hard-working pumps plus frigid air equal higher bills.
Power. Most real tubs run on 240V. If you’re tempted by a plug-and-play 120V unit, remember it usually heats slower and can’t run jets and heat at full tilt simultaneously. That might be fine from May through September. Come January, you will wish you had the 240V line. Budget for an electrician and a proper GFCI disconnect near the unit. This isn’t the place to get creative.
Cover and lifter. Buy the best cover you can justify and a lifter that fits your layout. A cover saturated with water becomes a two-person job, and winter is not kind to weak hinges. The lifter style also determines clearance against a fence or wall. Measure twice, then measure again with mittens on, because movement in winter gear takes more space.
Site Planning You Won’t Regret
Most people place the tub where it looks good from the kitchen window. That’s one factor, not the most important one. Start at your back door and walk the route in your head on a dark February night. Now design around the weak points.
Distance matters. If your path is more than 8 to 10 meters, you will start to ration your visits, especially on windy nights. Place the tub within a short, direct walk from the door you actually use in winter. I’ve seen tubs 2 meters from a garage man-door outperform tubs with picture-perfect deck views simply because the owners used them daily without thinking.
Privacy layers beat single walls. A fence panel can block a street view, but sightlines from upstairs windows or neighboring decks can feel exposed. Stagger short privacy screens, shrubs, and a trellis to soften sightlines without trapping steam. Remember, hot air rises. If you cap the space with a solid roof, you’ll need ventilation to avoid a clammy, fogged-in experience.
Wind breaks should be permeable. Solid walls turn wind into eddies that blow steam back in your face or dump snow exactly where you step out. A slatted screen, spaced boards, or winter-hardy ornamental grasses slow wind without creating turbulence. When I retrofit spaces, I often replace every third solid fence board with a slightly wider gap near the tub. It’s astonishing how much calmer the air feels.
Don’t create a skating rink. Snowmelt from a steamy tub re-freezes. Grade the pad and the path with a slight slope away from the walking line. I like polymeric sand pavers or textured concrete with a light broom finish. Stamped concrete looks sharp in summer, but it can be too smooth in winter. If you’re already committed, you can add anti-slip coatings to high-traffic strips.
Lighting that respects your eyes. The line between cozy glow and interrogation spotlight is thin. Low-voltage path markers, a warm 2700K wall sconce near the door, and a small downlight by the steps usually do the trick. Aim lights toward the ground, not outward, so steam doesn’t glow like stage fog. Motion sensors are handy, but set a linger time so the lights don’t go dark while you’re mid-soak.
Foundations and Decks that Survive Winter
A hot tub pad can be as simple as a compacted gravel base with patio slabs, or as robust as a poured concrete slab. Both can work. The difference is in preparation.
For pavers, dig below the topsoil and get to firm subgrade. Compact in lifts with a plate compactor. Add geotextile fabric if the soil is clayey, which it often is in Winnipeg. Top with a minimum of 10 to 15 centimeters of compacted limestone screenings. Set large-format slabs, check for level, and use a long level across the entire footprint, not just corner to corner. The tub does not care if each slab is level to its neighbor. It cares that the whole plane is level within a few millimeters.
For a slab, a 10 to 12 centimeter thickness with rebar grid and proper base prep is plenty. Don’t pour tight to a fence or house foundation. Leave a small gap for drainage and future service access. If you plan to build a pergola later, stub in footings now, separate from the slab. Attaching structure to the tub slab invites cracks and movement.
For decks, scattershot reinforcement is not enough. Find the tub’s exact leg locations, then double or triple the beams under those points. Joists alone won’t carry the load. If you don’t know the leg pattern, you can add a full support grid of 6 by 6 posts and beams under the tub area. When in doubt, overbuild. I’ve seen one winter turn a “should be fine” deck into a sagging mess.
How to Keep Steam, Sound, and Neighbors Happy
A hot tub is not a silent object. Pumps hum, water splashes, and people feel chatty in warm water. Good neighbors are priceless, so design with them in mind.
Position the equipment side away from the closest property line if possible. The cabinet’s access panel contains the pump area and heater. Angling that side toward your house or a fence break can reduce perceived noise. Dense shrubs like cedar hedges help, but keep them far enough away to allow service access.
Choose a soak schedule that respects quiet hours. If you like late-night sessions, aim your conversation inward and consider a battery-powered white-noise unit near your path to mask voices. It sounds excessive until you realize how far sound carries in still winter air.
Steam travels straight up, then rolls wherever the wind takes it. If your neighbors’ bedroom windows are right there, a small, spaced trellis overhead can guide the plume without trapping it. I’ve built two-post frames with a simple lattice top, left open enough for summer breezes. It redirects steam just enough to save awkward morning chats.
Finishes and Materials that Age Gracefully
The tub shell gets all the attention, but the materials that touch your bare feet, towels, and hands decide whether the space feels refined or like a campsite.
Decking. High-quality composite is easy in winter, but in deep cold it can be more slippery than cedar if it has a smooth cap. Choose a textured composite or stick with tight-grain cedar and maintain it. If you want pavers, pick a lightly textured surface and avoid super-dark colors that show salt and slush stains.
Steps and handholds. Even if you are spry, build a proper step with a landing against the tub. A single rung leads to slips. Add a simple rail or a sturdy grab bar on the tub cabinet side that can be fastened without violating the shell. Many tub makers offer compatible bars. They seem optional until the first icy day, then they become your favorite feature.
Towel management. A simple wall-mounted rack is fine in summer. In winter, you want warmth and speed. I’ve used a heated towel cabinet in a weather-rated enclosure for serious enthusiasts. A more practical middle ground is a lidded storage bench with a few reusable hand warmers inside. Tuck towels in before you step out. The goal is to never drape a towel over the cover to freeze into a flag.
Chemicals and storage. Keep test strips, sanitizer, and a skimmer in a sealed tote near the tub, ideally inside a small deck box. Liquids can thicken in cold, so store the bulk inside the house and decant a small working supply outside. If children roam your yard, add a lock to the box. It is astonishing how curious kids are about bottles that say “shock.”
The Art of Shelter without Suffocation
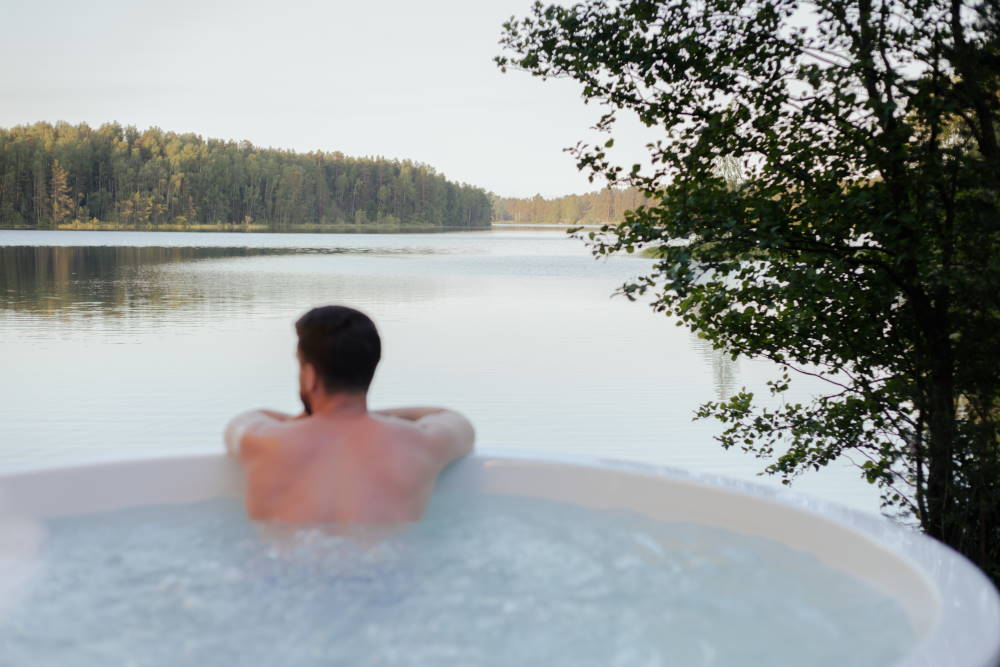
Many people dream of a pergola over the tub, and when it’s right, it’s lovely. When it’s wrong, it becomes a damp cave.
![]()
Think in layers. A slatted roof can provide shade in summer, but leave enough open space for steam to escape in winter. If you want more coverage, consider a retractable shade canopy or a polycarbonate panel over just one section, not the entire footprint. That creates a dry zone for entry and exit without turning the tub into a greenhouse.
Mind your clearances. Covers need to flip and swing. Cover lifters generally require 45 to 60 centimeters of rear clearance and a bit of overhead space. More than once I’ve seen a beautiful timber beam sitting exactly where the cover wants to go. The result is daily wrestling, which ruins the magic. Mock the cover movement with cardboard before you finalize the roof.
Snow load and drips. Any solid roof needs a real plan for snow. Pitch it, or keep the area small. Also, think about drip lines. Meltwater that falls on the cover edge creates a frozen ridge. Extend a small drip edge past the landing area so water drops onto gravel, not your step.
Planting for Four Seasons
You don’t need a botanic garden to make a hot tub feel lush. A few resilient, well-placed plants change everything.
Go for structure, not just flowers. Evergreens provide year-round privacy and soften the visual bulk of a tub. Columnar cedars or junipers do well in sheltered spots. Ornamental grasses like feather reed grass add movement and a pleasing rustle without overhanging the water with litter.
Avoid messy droppers. Bigleaf trees that shed catkins, seeds, or sap will turn your cover into a sticky mat. If your yard already has them, position the tub to minimize overhead coverage. Place leaf-heavy shrubs several meters away. The fewer floaties you skim, the more you soak.
Pots can be practical. If your soil is stubborn clay, use frost-resistant planters with heavy bases that won’t tip in wind. Group them to define a small courtyard effect. In winter, leave them in place as sculptural shapes, then refresh in spring. No need for complex irrigation. A quick daily water in summer is plenty.
Lighting and Ambience without Cheesy Add-ons
Hot tub mood lighting can go sideways fast. Blue LED strips and disco color wheels are fun for five minutes and then feel like a party you forgot to turn off. Aim for warm tones and restraint.
Soft pathway lights are your hero. Two or three low fixtures spaced along the route are better than one bright spotlight. A small, shielded downlight over the step to the tub might be the best dollar you spend. Interior tub lights on a low setting give the water a glow without attracting bugs in summer.
Candles are romantic, until the wind extinguishes them. If you crave that flicker, use battery lanterns with warm filament-style LEDs. Place them where steam won’t condense on the lens. Avoid anything with a fan or scented oils near the water, because hot, moist air carries fragrance like a freight train.
Music is optional. If you add a speaker, wall mount it away from neighbors, set volume limits, and keep it out of the steam plume. Outdoor-rated, not kitchen Bluetooth. For winter nights, ambient playlists at whisper volume let you hear snowflakes land. That’s a real thing. You only notice it when the rest of the setting is quiet.
Winter Operations and Energy Smarts
Let’s talk running costs and habits. A well-insulated 240V hot tub, kept around 38 to 40 degrees Celsius, often costs in the range of 30 to 60 dollars per month in winter here, depending on tub size, insulation quality, wind exposure, and how often you open it. A tub that leaks heat through a tired cover can double that. The math isn’t mysterious.
Keep the cover clean and tight. Snow adds weight. Brush it off with a soft broom after storms. Check the skirt for rips where wind can enter. If you see steam escaping, you are watching money evaporate.
Don’t chase temperature every day. Constantly dropping the set point, then boosting it before a soak, can force the heater to run more often. If you use the tub several times a week, pick a comfortable number and leave it. If you travel for more than a week in winter, drop it to a safe, lower temperature like 32 degrees, but don’t go cold. Restarting from near-freezing can strain components.
Mind the water chemistry tightly in winter. Cold weather doesn’t slow sanitizer demand as much as people think, because you are in the water more often, and bather load matters. Keep a small spill kit for winter spills and a spare filter on hand. Swap filters, bring the dirty one inside to rinse in a laundry sink with warm water, and rotate.
GFCI test and service checks matter more in the cold. Press the test button monthly. If it trips repeatedly, don’t ignore it. Call your dealer or electrician. Water and electricity behave differently in dry cold air, and contacts can loosen with thermal cycling.
Layout Inspirations That Work in Real Yards
A few proven arrangements have emerged from countless Winnipeg backyards. Steal freely and adjust to your site.
Courtyard nook near a garage man-door. Imagine a 7 by 7 tub on a paver pad, tucked 2 meters from the garage entry, shielded by a 1.5 meter wind screen set at 45 degrees to the prevailing northwest winds. A small downlight above the door, three path markers, and a tall storage bench for towels. A single cedar trellis panel frames the view and knocks down sightlines from a neighboring second-story window. This layout is efficient, discreet, and storm-proof.
Deck corner with partial pergola. On a raised deck, recess the tub into a corner, flush with the deck surface, but keep the top lip proud by 10 centimeters to prevent splash creep. Add a two-post pergola with a slatted top above the entry side only. Steps widen to form a mini landing. Planters with grasses and small evergreens bracket the path. Equipment side faces the house wall to reduce noise carry. This reads tailored and integrates the tub, not just plops it.
Garden path pad with four-season structure. For larger yards, place the tub on a slab tucked behind the main patio, connected by a 120-centimeter wide path of textured pavers. A slim roof, just big enough to cover the step and one seat, tilts away to shed snow. On the opposite side, a row of columnar cedars forms a green privacy spine. Low garden lighting and a discreet storage box complete the system. This approach creates a destination that still breathes.
Buying Smart in a Sea of Choice
You can find plenty of hot tubs for sale online, but the right model plus the right dealer beats a flashy price tag. A good local dealer answers the call when a heater throws an error in January. When you search “hot tubs store near me,” prioritize service reputation over showroom theatrics.
Test for noise and ergonomics in person. Ask to hear a tub with all pumps on. Some cabinets amplify resonance. If you can, sit in a dry shell to check seat depth and footwell space. Better yet, book a wet test. It feels strange, it’s worth it.
Ask to see inside. A dealer who readily removes a side panel to show insulation, wiring neatness, and plumbing quality is a dealer who believes in the product. Look for tidy hose routing, secure clamps, and clean penetrations. Sloppy inside usually means headaches later.
Check the cover hinge and density. Pick up a corner. Good covers feel dense but balanced. Ask the R-value and how it’s achieved. Some manufacturers use tapered foam to shed water. That’s good. Zippered jackets for foam inserts are even better for future replacement.
Clarify warranty and service response times. A five-year shell warranty is standard, but heater and pump coverage varies. Ask about winter service protocol, response times, and loaner heaters or bypass kits. When it’s minus 30 outside, days matter.
The Last Meter: Details That Change Everything
If you remember nothing else, remember this: the 1 meter around the tub is the most important real estate in your backyard. That’s where bare wet feet hit the ground, hands search for rails, and towels either stay dry or become useless.
Build the path once, build it right. A smooth, well-draining surface that you can clear quickly will make you use the tub. I’ve seen owners heat their path with electric mats under pavers or seasonal plug-in mats on top. Both work. The simplest solution is still a short, straight, grippy path you can clear in two minutes.
Add one honest place to sit and one honest place to put things. A bench to tie slippers or set a phone, and a reliable hook or closed bin for towels. Skip cute tiered stands that tip in wind. Use fewer, sturdier pieces.
Plan for maintenance access. You will eventually need to get into the equipment bay, replace a pump, or swap a heater. Leave at least 60 centimeters clear on that side, even if it ruins a perfectly symmetrical design. Your future self, kneeling with cold fingers, will raise a mug of hot chocolate in your honor.
A Simple Planning Checklist
- Measure the access path for delivery, including gates and tight corners, and plan removal of fence panels if needed. Confirm electrical needs with a licensed electrician, including conduit routes, GFCI location, and disconnect clearance. Choose a foundation method suited to your soil and frost depth, and verify leveling across the entire tub footprint. Map winter wind and privacy lines on the actual site, then place screens and plantings with service access in mind. Test-fit cover and lifter clearances with mockups before finalizing pergolas, rails, or nearby furniture.
Why Winnipeg Makes Hot Tubs Better
People think of hot tubs as summer luxuries. Winnipeg turns them into winter sports. That first step into steaming water while the air nips your nose, the brief hiss as you sink to your shoulders, and the quiet crackle of distant ice are experiences that stick. The right design means you get those moments easily, often, and without fuss. If you’re browsing hot tubs for sale or weighing which Winnipeg Hot Tubs dealer to visit, remember you aren’t just buying a product. You’re building a ritual.
The best installations I’ve seen share a few traits. They’re close to the door, protected from wind, lit with care, and built on foundations that ignore frost. They favor comfortable seating over gimmicky jets. They treat the cover like the energy-saving device it is. They keep towels warm and feet dry. They plan for the messy parts: leaves, snow, rain, service calls. And they make room for the small luxuries, like a hook right where your robe hand reaches without thinking.
Do that, and your backyard stops being a place you glance at through the kitchen window for four months of the year. It becomes a refuge. A Winnipeg backyard that works in January makes the rest of the calendar feel trivial. When you find a hot tubs store near me search result that leads to a knowledgeable dealer, bring your questions, your measurements, and your skepticism. Then commit to the details that matter. The first time you watch breath and steam mingle under a starry, ice-cold sky, you’ll know the design got it right.